Excel to HTML: How to Customise Your HTML Table
Easy steps to help you design the perfect table.
This guide assumes you can already correctly format your file for upload. Tables need to start in the A1 cell, more information here: Excel to HTML: How to Format Your Excel File
Step 1: Table Logic
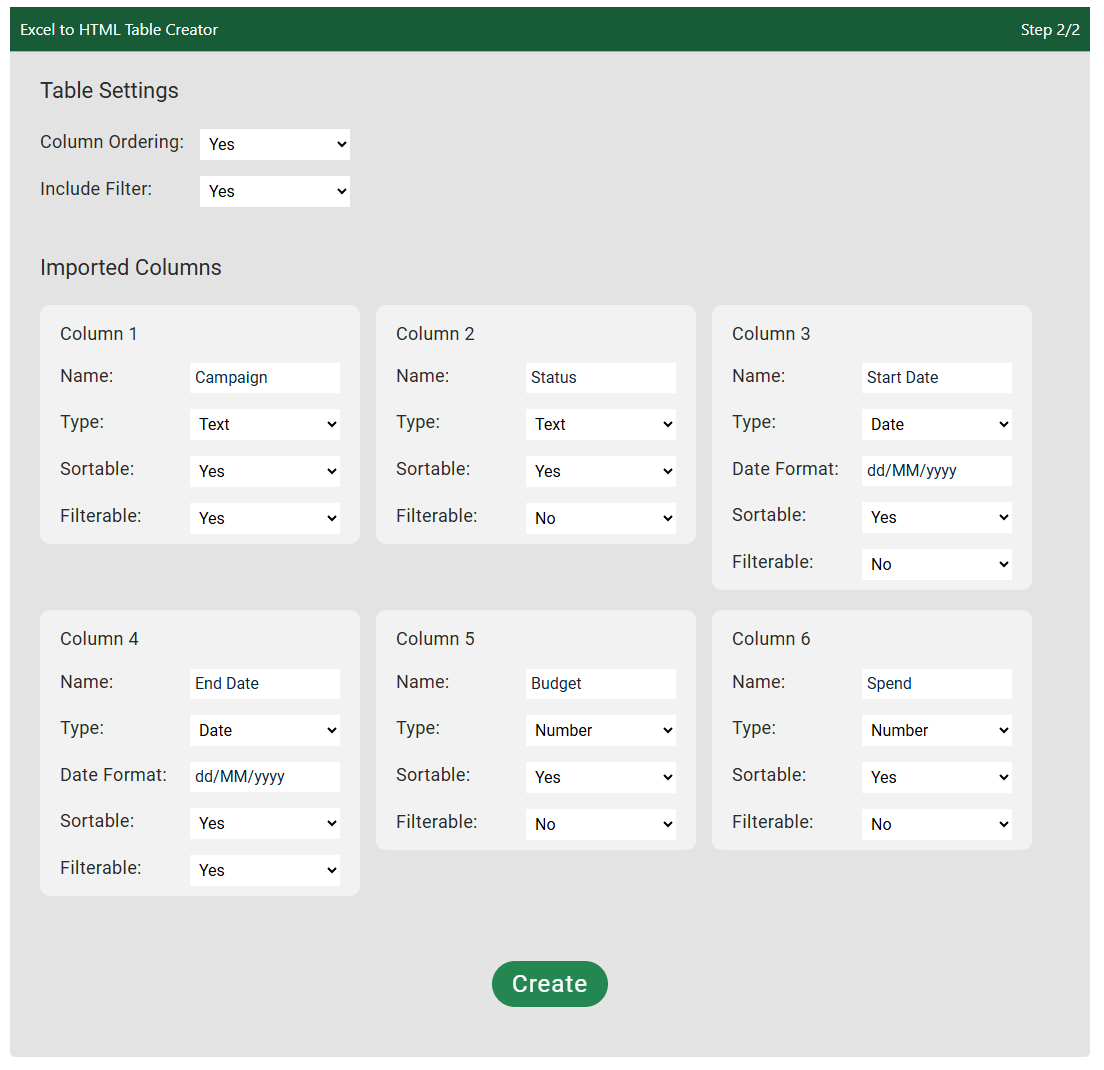
Once you have imported an Excel table, you will first be given a set of options to configure the features you want to be switched on or off for the entire table as well as each column. For example, you could choose to switch on filtering for a couple of columns and switch on ordering for all columns.
Hint: By default, all columns will be sortable and filterable.
Step 2: Visual Design
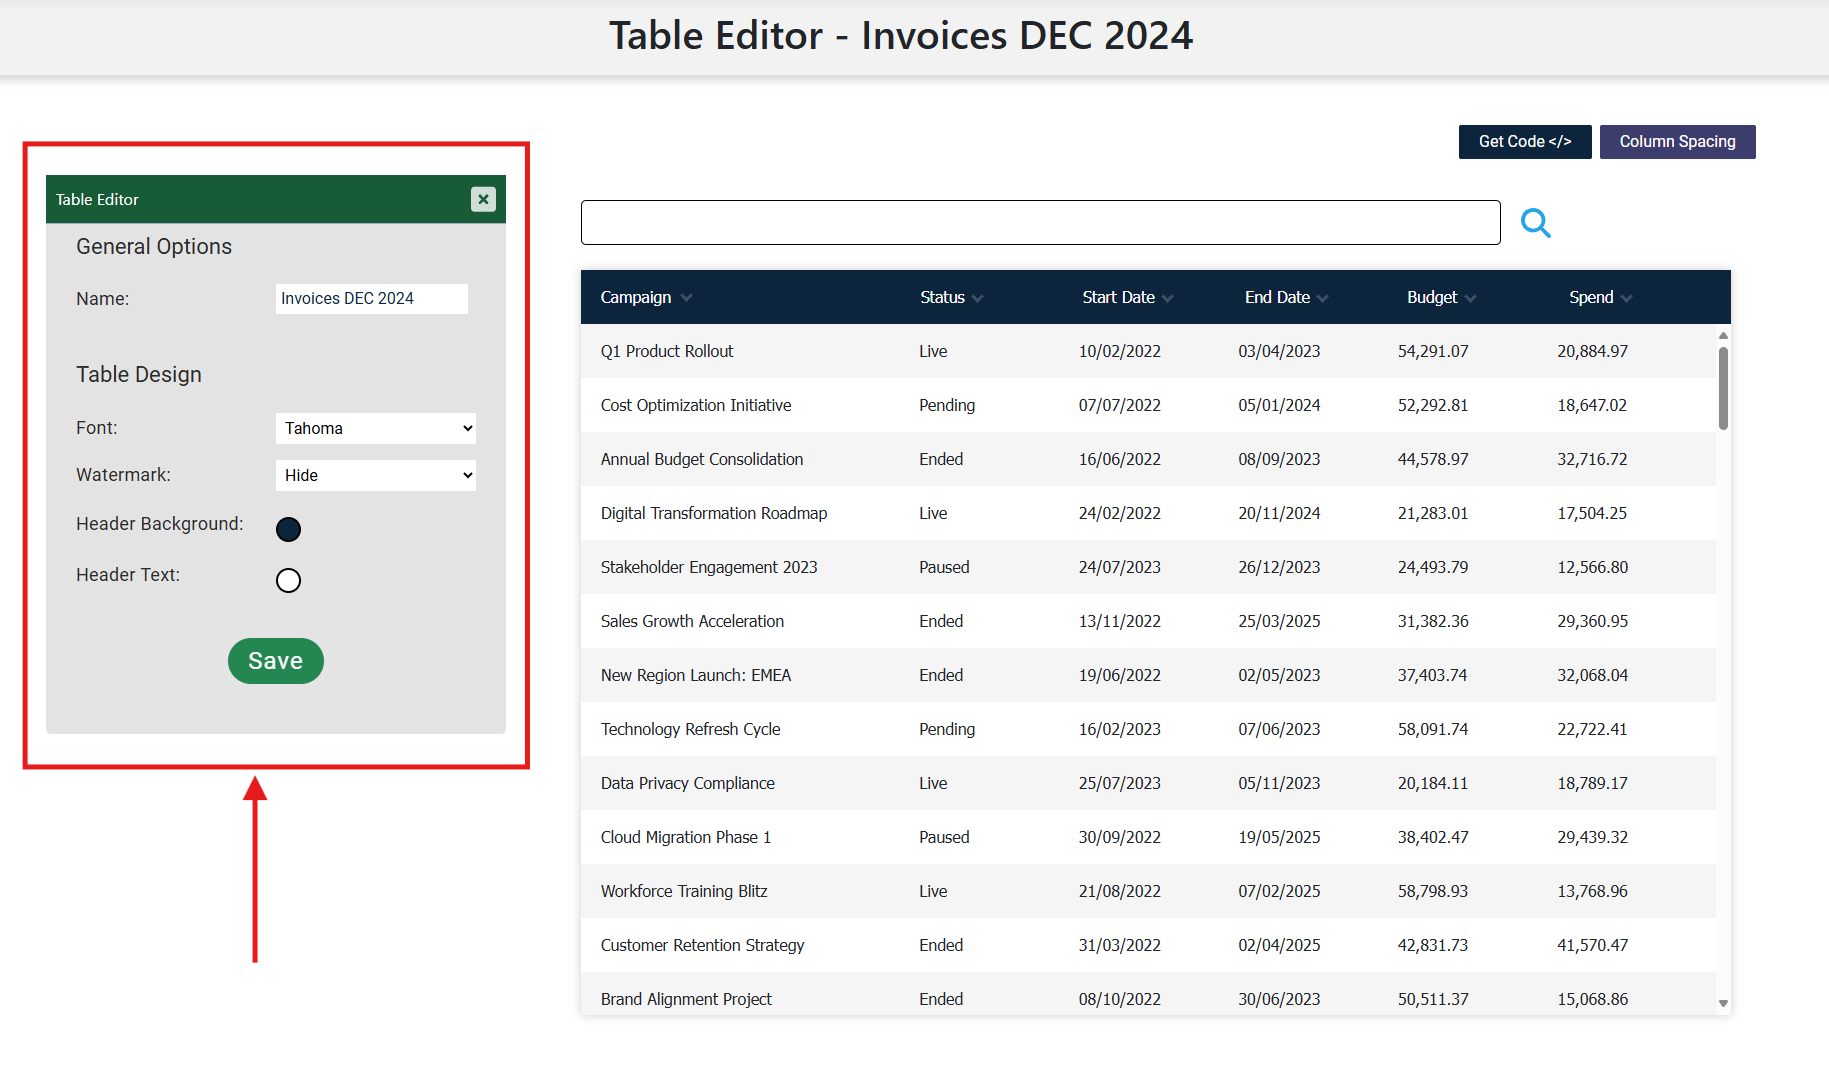
Once you have chosen the right behaviour, after clicking 'Create' you will be taken to the Table Editor where you can design how it looks. There are two sections for editing table design. The first is for the look of the whole table, the second is for adjusting column widths.
Section 1: Table Editor
In the first section you must give your table a name, then you can pick a font, choose whether or not to hide the watermark and pick header colours.
Hint: It is recommended to save a new table immediately after choosing a name, as we only store it for 30 minutes unless you save.
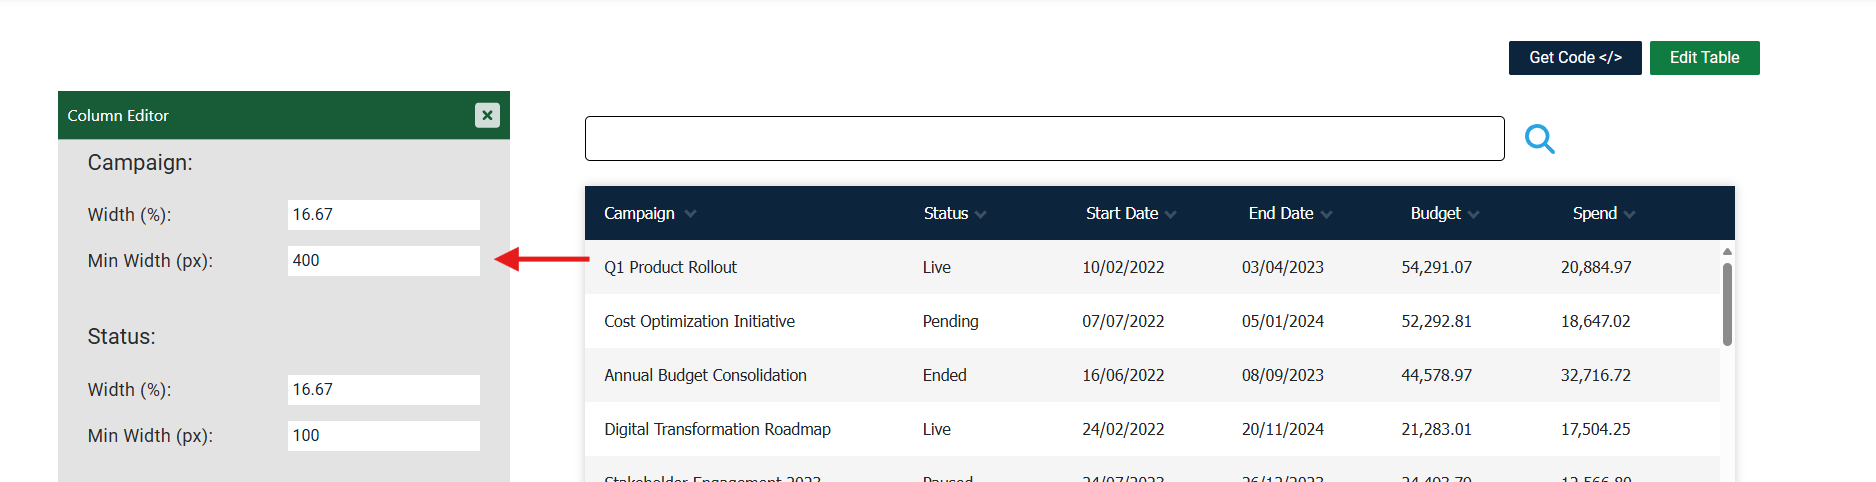
Section 2: Column Spacing
If you want to have more control over the table layout, you can click the 'Column Spacing' button to open the Column Editor. By default, all columns are equal width with a minimum width of 100px. In the example below, we have changed the minimum width for the first column to 400px, so there will always be enough space to display the campaign names without it wrapping.
Hint: Try changing the size of your browser window to observe how things will look on different screen sizes.
To Conclude
You have now learned how to configure your HTML table to look and feel exactly how you need. Good luck! Any questions, ask away at besoftware.contact@gmail.com.
Our next article is: Excel to HTML: How to Use Your Table in Your Own Website
Home